Welcome

I am addicted to cooking and baking. I love to find and make delicious recipes. Sometimes I create my own and I post them here. Other times I find a recipe and adapt it. I have posted those recipes here as well. Enjoy.
Showing posts with label Easy. Show all posts

Monday, January 28, 2013

SLOW COOKER DINNER ROLLS


INGREDIENTS:
1 ¼  Cups Warm Milk (water can be substituted)
1 Tablespoon Yeast
1 Tablespoon Sugar
½ teaspoon Salt
1 ½ Tablespoons Oil
½ cup sugar
3 – 3 ½  Cups Flour
Butter flavored cooking spray
½ cube of butter

DIRECTIONS:
First:  Add yeast and then sprinkle the sugar over the 1 1/4 cups of milk.  Stir until sugar dissolves.  Let it sit for about five minutes until you see the yeast get all bubbly on top.
Next:  Stir in the salt, oil, sugar and flour.
Then:  Knead (or use the pastry hooks on a blender) the dough for a few minutes until it is smooth and pulls away from the bowl.
Get out your slow cooker and line with parchment paper.  Spray parchment paper with cooking spray.
Roll the dough into Golf Ball sized balls.
Place dough balls into the slow cooker and pack tightly.  Turn the Slow Cooker to low and let rise for 1 hour and 15 minutes. 
Soften ½ cube of butter.  Place softened butter between the risen dough balls.  Turn the slow cooker on high and let cook for 1 hour and 15 minutes.
Remove from slow cooker and place on a baking sheet. Spread/brush more butter on top.  Broil in the oven on high for about 1 or 2 minutes, turning frequently to brown evenly.
Serve immediately with butter or jam.


Thursday, August 23, 2012

CHEESE WEDGE BISCUITS – adapted from Family Fun Cookbook, page 112


2 cups all purpose flour
1 tablespoon baking powder
¼ teaspoon salt
1 teaspoon garlic powder
5 tablespoons butter
1 cup grated cheddar or cheddar/jack cheese blend
2/3 cup milk
½ cup grated cheddar cheese


Preheat the oven to 425 degrees. 
Combine the flour, baking powder, and salt in the bowl of a food processor or electric mixer. 
Add the butter in chunks and blend until the mixture resembles a coarse meal. Add 1 cup grated cheddar or cheddar/jack blend.
Add the milk and mix until just combined. 
Turn the dough out onto a lightly floured surface (a pastry mat works great) and pat into a round, about 1/3 inch thick.
 Place the round in a 9 – inch pie plate and cut into wedges. 
Cover evenly with the cheese and bake for 15 minutes, or until lightly toasted on the top.  If the cheese has not browned, broil for 1 minute.  Makes 6 large wedges.


Thursday, July 12, 2012

PINA COLADA SQUARES


 –  Adapted from Page 238 of Better Homes and Gardens New Baking Book


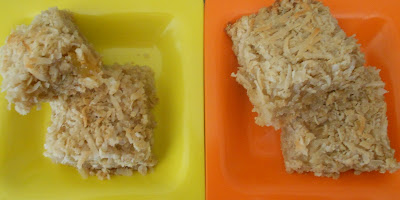
My son loves these bars so much that upon his request I brought  these bars to his school for his birthday celebration.  He prefers these bars to cupcakes.  The rest of the class loved them also.  These little bites of tropical paradise are made with whole grains (wheat and oats), and half the sugar of most recipes.

Ingredients:
2 cups all-purpose flour (or 1 cup all-purpose flour, and 1 cup whole wheat pastry flour)
2 cups quick-cooking rolled oats
½  cup packed brown sugar
¼ teaspoon baking soda
1 cup butter cut into squares to blend in with a pastry blender
1 ( 12 oz.) container pineapple ice-cream topping
1 cup coconut
-          In large mixing bowl combine the flour, oats, brown sugar and baking soda.  Using a pastry blender, cut in butter until mixture resembles coarse crumbs.  Reserve 1 cup of the crumb mixture for topping.  Press the remaining mixture into the bottom of an ungreased 13X9X2 inch baking pan.
-          Spread pineapple topping evenly over the crust
-          For topping, stir coconut into reserved crumb mixture.  Sprinkle topping evenly over the pineapple filling.  Bake in a 350 degree oven about 30 minutes or until golden.  Cool.  Cut into bars.


Thursday, April 26, 2012

Frozen Yogurt and Chocolate Bliss Cups


Frozen Yogurt and Chocolate Bliss Cups - (dark chocolate, Greek yogurt, and pure awesomeness) Easy to make. These are little delights that are a refreshing treat. Fairly healthy for a delicious mini frosty morsel. Serve these at a gathering and your guests will not be disappointed.


My friend Jenn and I developed these little delicious gems.  Both of us are trying to come up with healthier desserts to offer our families.


Ingredients:
1 10 oz. bag high quality dark chocolate chips (I used Ghirardelli 60% Cacao Chips)
2 6 oz. containers Greek yogurt, naturally flavored, not plain (I used raspberry flavor)
16 Fresh Raspberries, washed and drained
Ziploc quart size freezer bag
Decorating tip and attachment
Cooking Spray
Mini Cupcake Papers

Yield: 16 mini cups

Melt the chocolate in a double boiler, stirring with a spatula.  The chocolate should be smooth and velvety.  Arrange your cupcake papers onto a baking sheet and lightly mist with cooking spray (be sure to coat the sides of the papers with spray, too).  Spoon (I used a mini teaspoon) the melted chocolate into the cupcake papers, coating the bottoms and sides entirely.  Put an extra spoon full of melted chocolate at the bottom of each cup.  Once all cupcake papers are coated, place the tray in the refrigerator to cool for about five to ten minutes.  Pipe(I used a quart size Ziploc freezer bag, stuffed the yogurt in it to one corner and then cut the corner at the tip and fastened the decorating tip to the bag** ) or spoon the yogurt mixture into the cooled chocolate cups. Place a single upside down raspberry in the center of each filled cup.  Cover with plastic wrap or one of those shower cap food covers and place the tray in the freezer for a 2 to 2 ½ hours or so to freeze completely.  Keep frozen and eat them immediately after they are served.
** a decorating tip is not essential, it will just make your little yogurt cups more festive.

Any flavor yogurt may be used.  Strawberry – garnish with a strawberry slice.  Blackberry – garnish with a single blackberry.  Cherry, garnish with a pitted cherry, etc.

Milk chocolate or semi sweet chocolate may also be substituted.


Tip – the raspberry may get frosty when you take them out of the freezer.  To take the frost off, make sure your hands are clean and dip your fingers in some warm water, then gently rub the raspberry with the warm water.  Serve immediately.

Variation: Chocolate Covered Frozen Yogurt Bliss Cups
When melting chocolate, melt about 5 oz. more.  Follow the directions above, but after you add the raspberry, add some melted  chocolate to cover the yogurt.  Partially submerge the raspberry in the chocolate covering.  Freeze as directed and enjoy.  See picture on bottom of page.

Ingredients

Cooking Spray Sprayed Cupcake Liners

Ziplock for Piping

Chocolate for Melting in Makeshift Double Boiler

Melted Chocolate

Chocolate Lined Cupcake Liner

Chocolate lined Cupcake Liner

Chocolate Cup Cake Liners on the Cookie Sheet

Yogurt in the Ziploc

Chocolate just out of the Refrigerator

With Yogurt Raspberry Piped In

Garnished with Raspberry ready to Freeze

Ready to Freeze

Just out of the Freezer

Ready to Eat
Chocolate Covered Variation: Ready to Freeze.  Chocolate had already begun to set when I took the photo.

Chocolate Covered Variation: Ready to Eat.  I hope to get a better photo of this.